Runtime Modes
RivetKit supports two runtime modes for running your actors:
- Serverless: Default mode. Responds to HTTP requests and scales automatically.
- Runners: Background processes without HTTP endpoints. Only needed for advanced scenarios.
Serverless
Serverless is the default and recommended mode. Rivet sends HTTP requests to your backend to run actor logic, allowing your infrastructure to scale automatically.
Benefits
- Platform support: Works with serverless platforms (Vercel, Cloudflare Workers, etc.)
- Scale to zero: No cost when idle
- Edge deployments: Easier to deploy to edge locations
- Preview deployments: Integrates with preview deployments on platforms like Vercel and Railway
- Efficient autoscaling: Request-based autoscaling can be faster and more efficient than CPU-based autoscaling depending on the platform
Example
import { actor, setup } from "rivetkit";

const myActor = actor({ state: {}, actions: {} });
const registry = setup({ use: { myActor } });

export default registry.serve();
import { Hono } from "hono";
import { actor, setup } from "rivetkit";

const myActor = actor({ state: {}, actions: {} });
const registry = setup({ use: { myActor } });

const app = new Hono();
app.all("/api/rivet/*", (c) => registry.handler(c.req.raw));

export default app;
See Server Setup for more configuration options.
Architecture
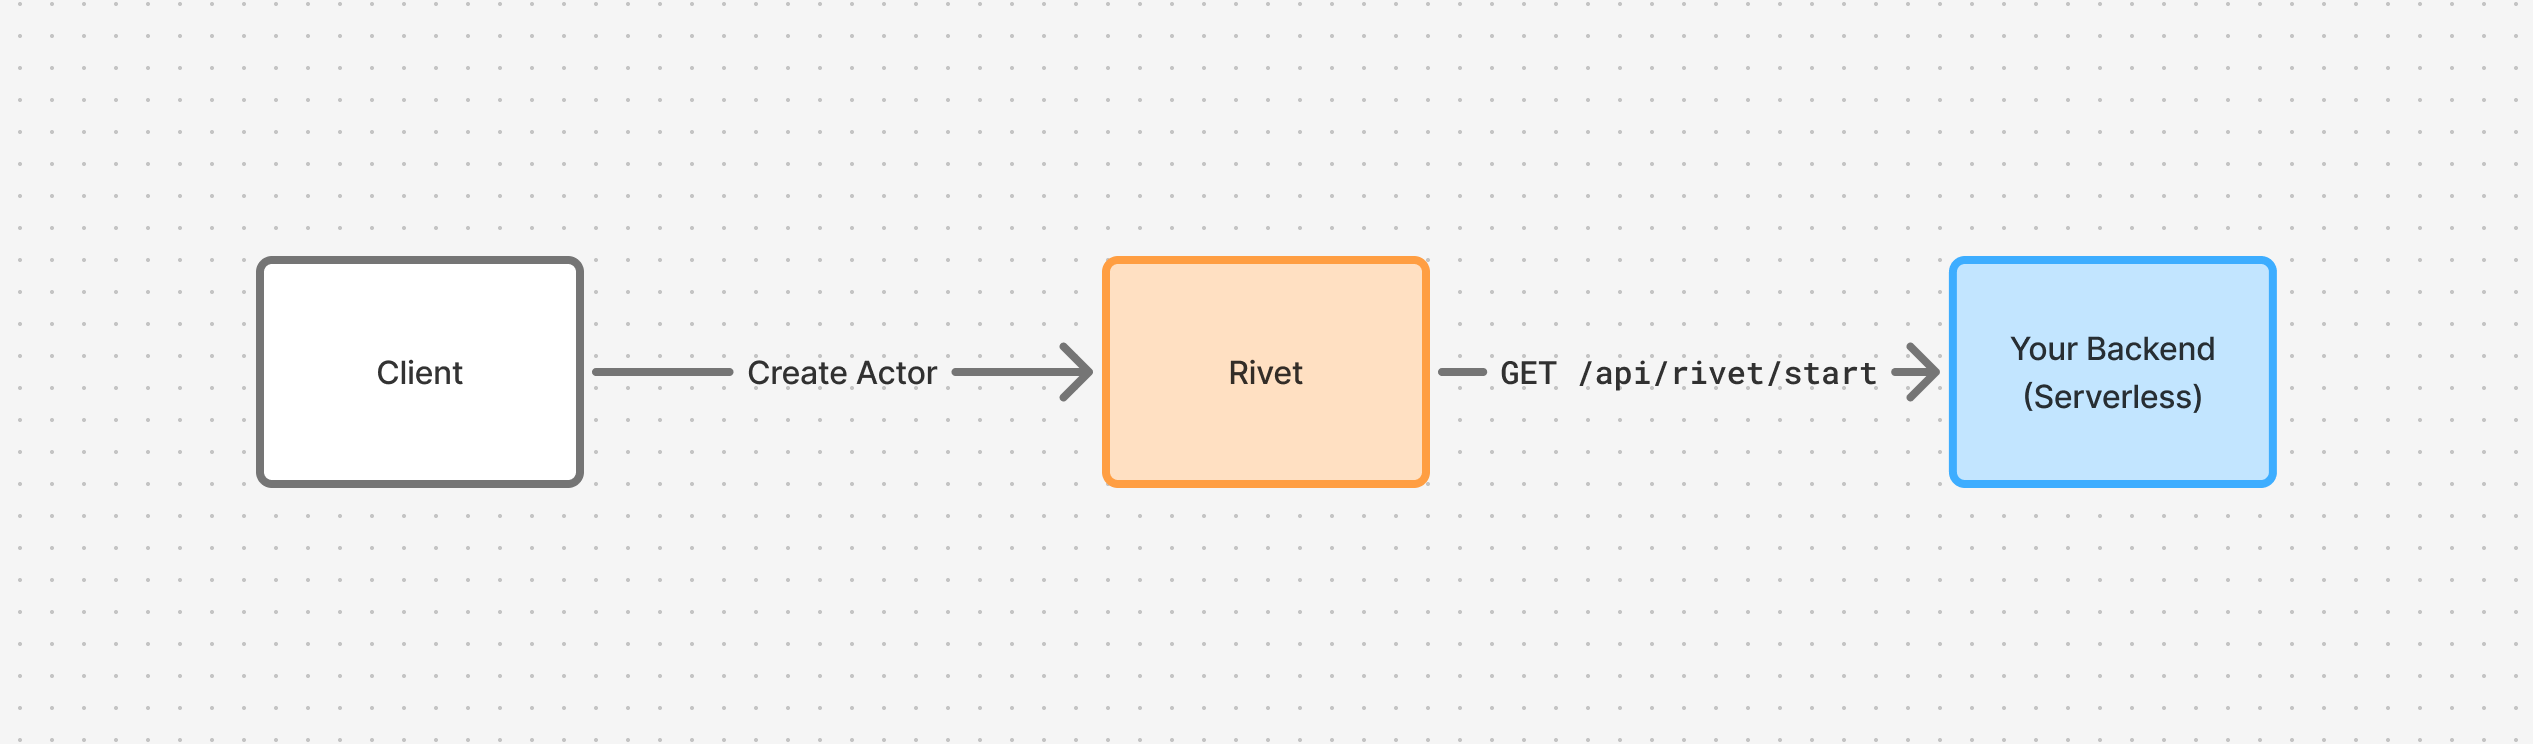
When a client creates an actor, it sends a request to the Rivet Engine. The engine then calls GET /api/rivet/start on your serverless backend to run the actor.
Advanced
Endpoints
Rivet exposes the following endpoints:
GET /api/rivet/metadata: Validates configurationGET /api/rivet/start: Runs an actor
You should never call these endpoints yourself, this is included purely for comprehension of how Rivet works under the hood.
Timeouts
Serverless platforms like Vercel have function timeouts. Rivet handles this automatically by migrating actors between function invocations, preserving state through ctx.state. Write your code as if it runs forever, Rivet handles the rest.
Read more about how we handle timeouts.
Shutdown Sequence
Each serverless request has a configurable lifespan (requestLifespan, default: 60 minutes). Set this to match your platform’s function timeout (e.g. requestLifespan: 3600 for Vercel Pro).
When the request nears its lifespan, the engine reserves a grace period (serverless_drain_grace_period, default: 10 seconds) at the end to gracefully stop actors. For example, with a 3600-second lifespan, actors begin stopping at 3590 seconds. After the full lifespan elapses, the connection is forcibly closed and any remaining actors are rescheduled.
See Limits for configuration details.
Runners
Runners run actors as long-running background processes without exposing an HTTP endpoint.
When to Use Runners
- No HTTP server: Your app does not or cannot expose an HTTP server
- No load balancer: You don’t have a load balancer to distribute HTTP requests across your servers
- Custom scaling: You have custom scaling requirements
Example
import { actor, setup } from "rivetkit";

const myActor = actor({ state: {}, actions: {} });
const registry = setup({ use: { myActor } });

registry.startEnvoy();
The runner runs in the background, ready to run actors.
Architecture
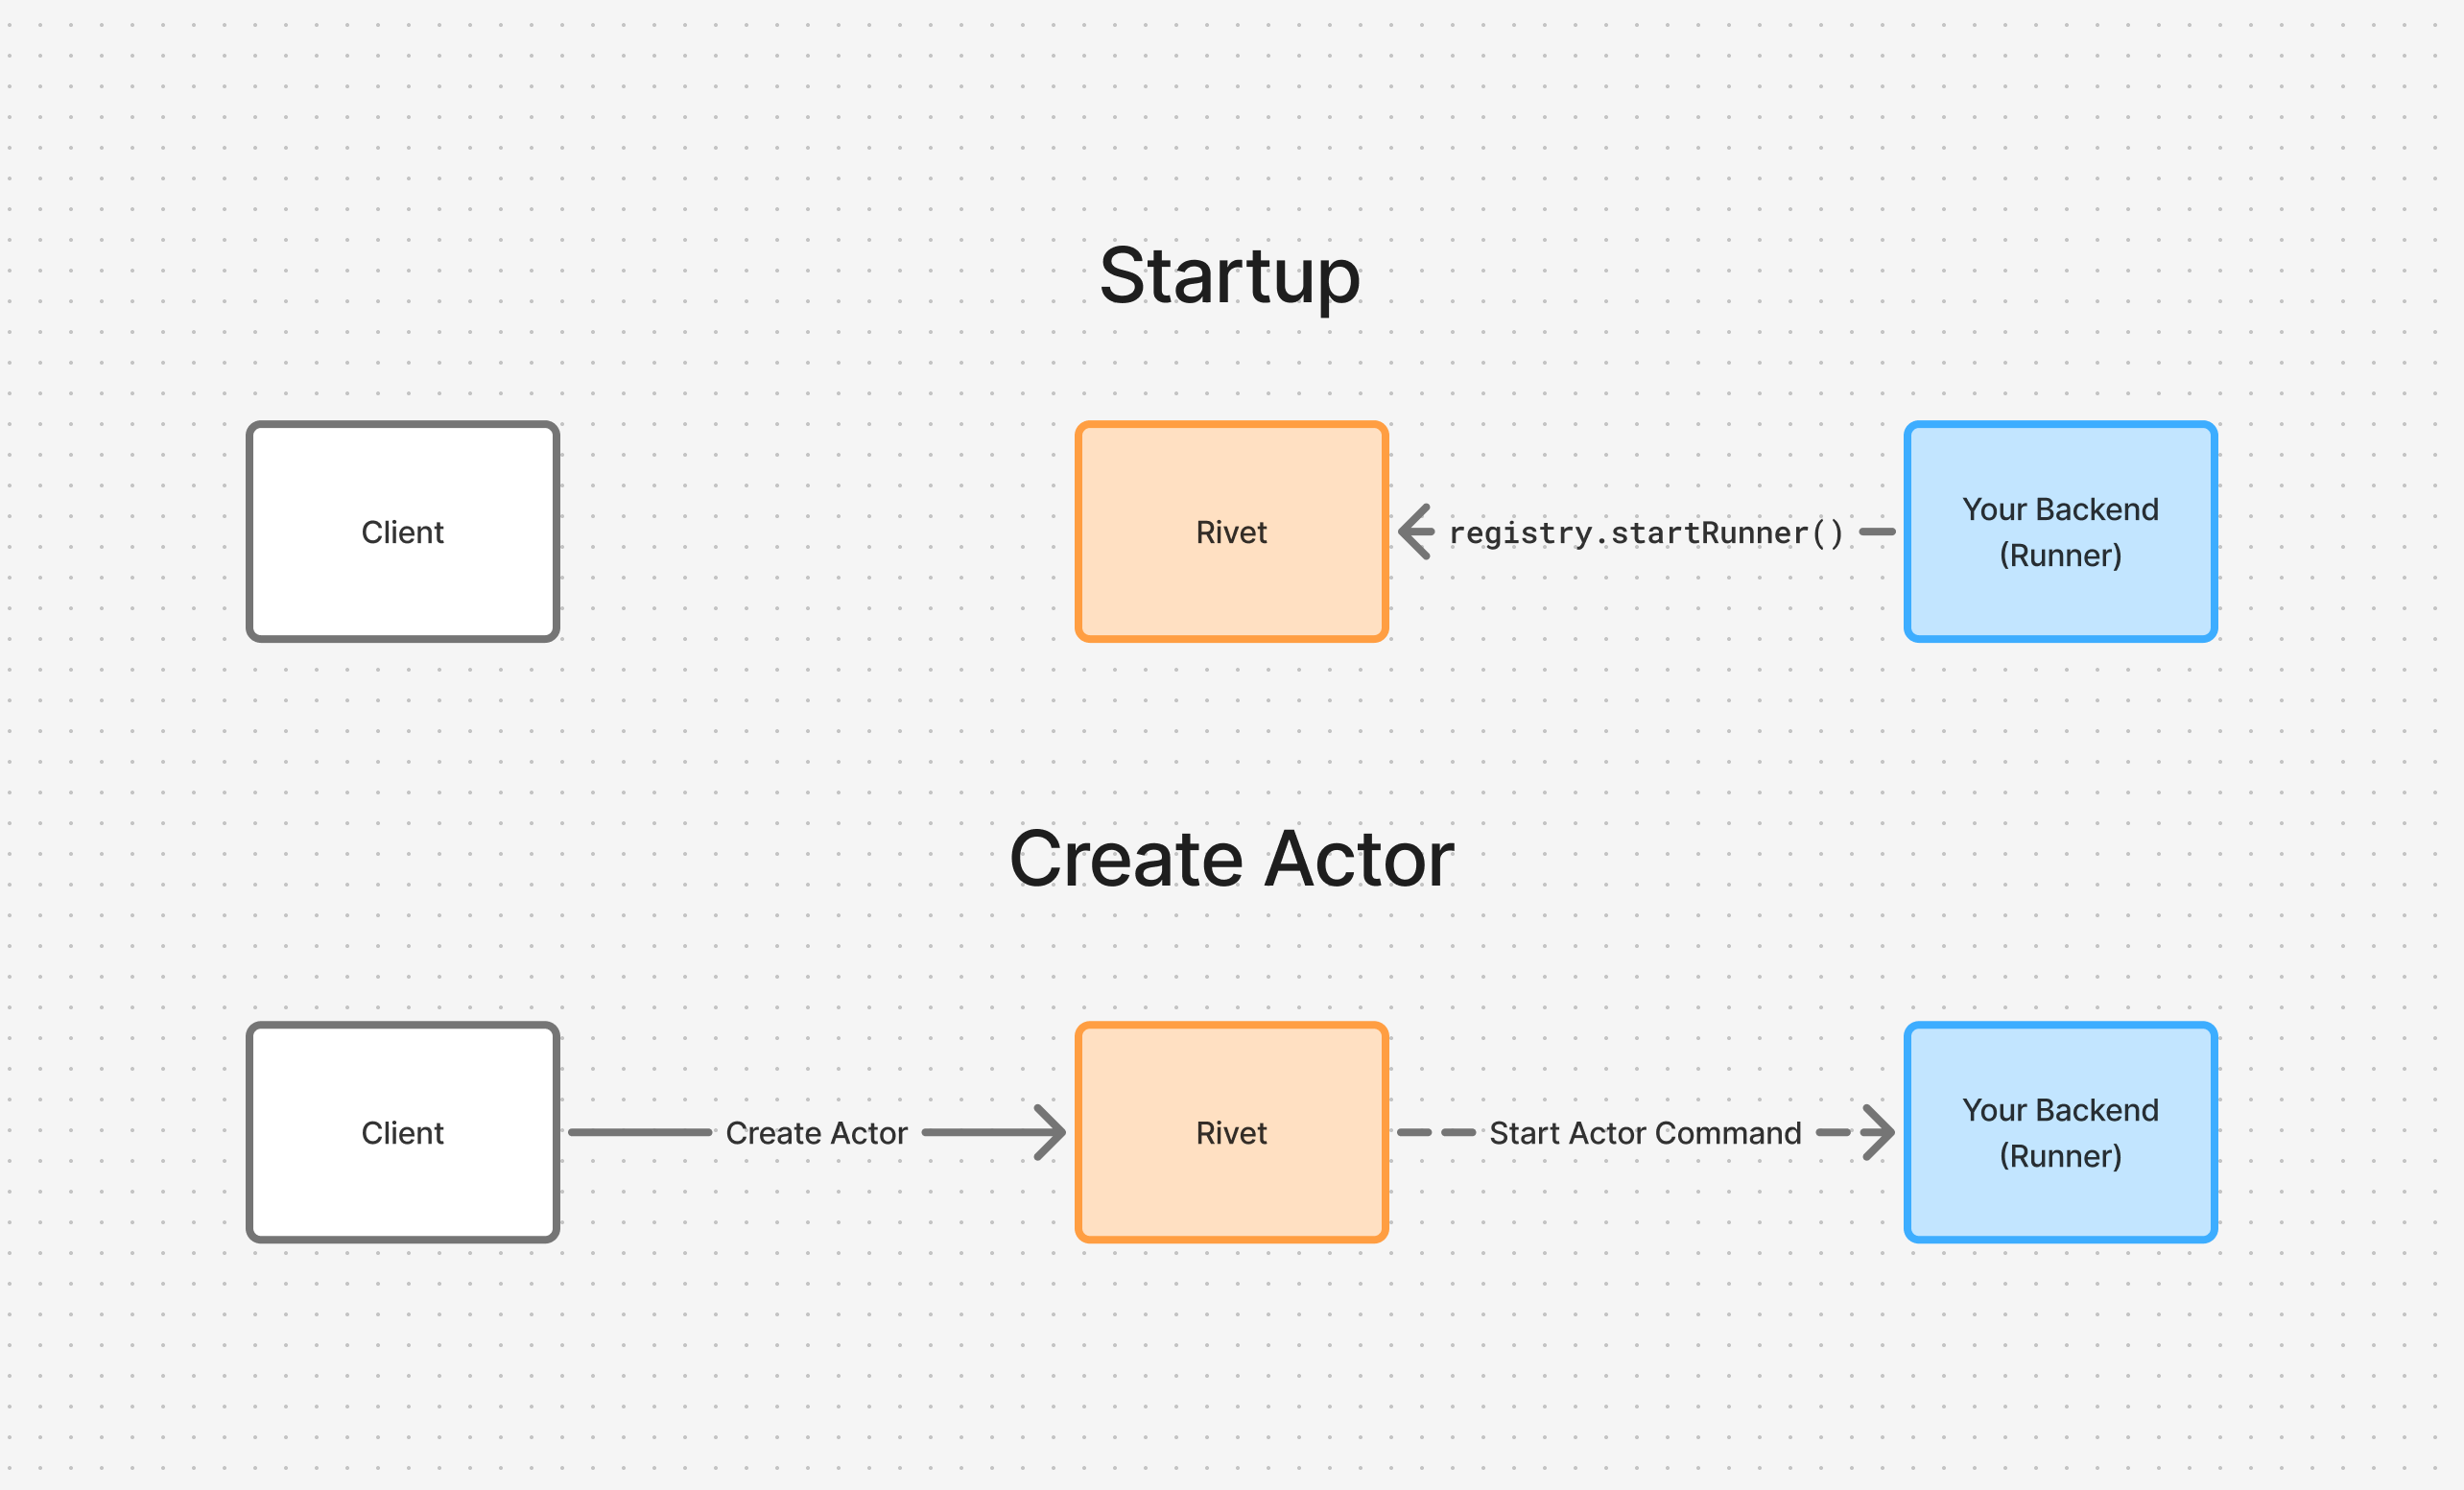
On startup, your backend calls registry.startEnvoy() which opens a persistent connection to the Rivet Engine. When a client creates an actor, the engine sends a command through this connection to start the actor on your backend.
Configuration
Runner Pool
Use RIVET_RUNNER to assign runners to a pool. This lets you control which runners handle specific actors.
RIVET_RUNNER=gpu-workers
import { actor, setup } from "rivetkit";

const myActor = actor({ state: {}, actions: {} });

const registry = setup({
  use: { myActor },
  envoy: {
    poolName: "gpu-workers",
  },
});
See Pool Configuration for how pools are scaled, drained on version upgrades, and rate-limited during actor eviction.
Comparison
| Mode | Method | Use Case |
|---|---|---|
| Auto | registry.start() | Simplest setup. Starts server, serves static files, and runs actors. |
| Serverless | registry.serve() | Fetch handler for serverless platforms |
| Serverless | registry.handler() | Integrating with existing routers (Hono, Elysia, etc.) |
| Runner | registry.startEnvoy() | Long-running processes without HTTP endpoints |